Our Beekeeping Journey – Here We Go!
We’re beekeepers now. That is really weird to say. Come along on our journey with us.
How This All Got Started
One day, out of the blue, Brian sent me an email. All it said was, “I think it would be cool to keep bees.”
What?! We’d never talked about bees in any way. We both liked honey but that’s as far as that went. Once I read his email I got up and walked over to him and asked if he was serious. He blinked once for yes.
I started poking around the internet and did a little research on the subject. It was doable. I reached out to two people I knew that kept bees. One was a former co-worker of mine named Betsy. I asked her opinion on the best way to get started. She recommended a book and said we’d go from there.
The book is called “First Lessons in Beekeeping” and it’s a staple for beginners. Much of the information in this post was gleaned from the book, and the internet.
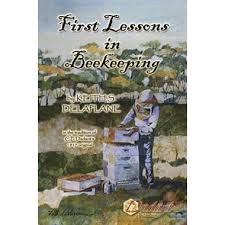 I snagged the book from Amazon and started reading. It is fascinating! The way the bees work together and know their jobs, it’s all so amazing. It will be like having a mini NatGeo channel in our own backyard! Not only will we have honey, but also great photo ops. We are so excited.
The Amazing Next Step
After some time I reached back out to Betsy and let her know I’d been reading and learning. The next thing I knew, we had a complete beginner set up kit with two hives and bee suit thanks to Betsy. We couldn’t believe it. Such love and generosity!

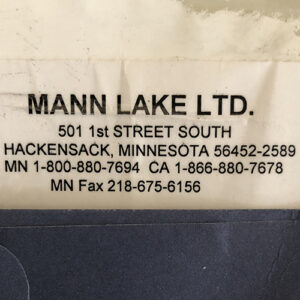
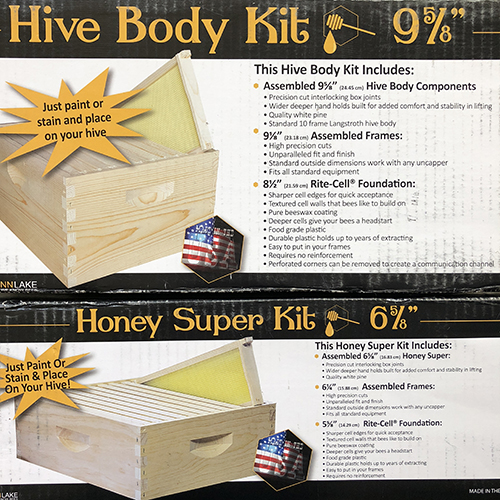
She’d ordered everything and had it delivered. It all came from Mann Lake Ltd. in Hackensack, MN. Props to them! The hives were built and packaged so well. Everything survived shipping with no issue at all.
I kept asking how much we owed her and she said nothing, that it was a gift of love to us. Whoa. Brian and I were so touched, and remain ever grateful still.
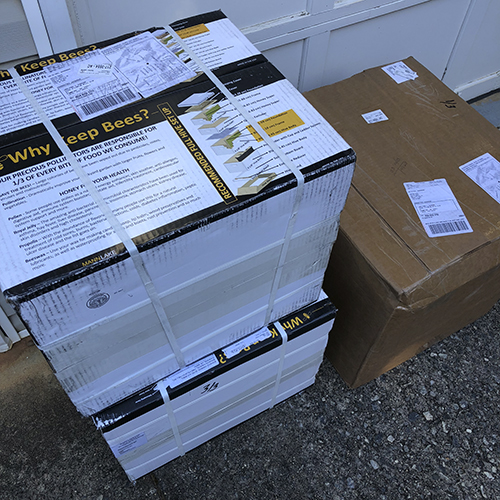
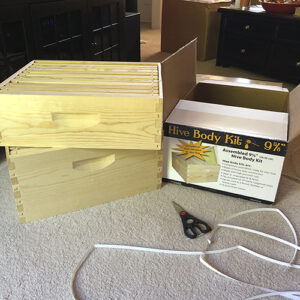
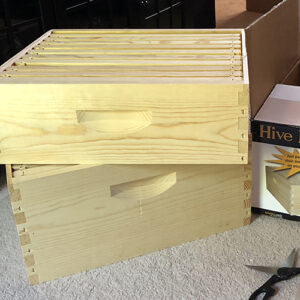
The hives were delivered. It was such fun to receive them. I swear it was like Christmas morning! I ran out to the driveway when the UPS truck showed up. I took pictures and squealed giddily around them.
It’s cool because the boxes have a picture of the hives and describes the different parts. That was a little reminder lesson in itself. I studied the boxes and smiled thinking about the adventure ahead.


First, A Bit About Beekeeping in General
Brian and I have seen beehives our entire lives. Neither of us thought much about them, other than seeing them on the side of the highway on road trips. Or maybe we heard about them through grandparents or relatives with farms. We knew they existed but didn’t learn about them.
I am so glad Brian wanted to do this. It’s been so much fun learning and thinking about what it would be like to be beekeepers. There are a few different methods of beekeeping. The one we are using is called the Langstroth method.
A Langstroth hive is any vertically modular beehive that features vertically hung frames, a bottom board and supers. According to wikipedia, “In 1851, the Reverend Lorenzo Lorraine Langstroth (1810–1895), a native of Philadelphia, noted that when his bees had less than 9 mm (3⁄8 in) but greater than 6 mm (1⁄4 in) of space available in which to move around, they would neither build comb into that space nor cement it closed with propolis. This measurement is called “bee space”.
Like, totally amazing, right?!
Setting Up The Hives
Hives can be ordered assembled or not. Betsy asked which we preferred. Considering caregiving needs I went ahead and got them assembled.
I took everything into the living room so Brian could see. I opened the boxes in front of him so that he could share in the excitement. We had fun looking at everything and talking about the different parts.
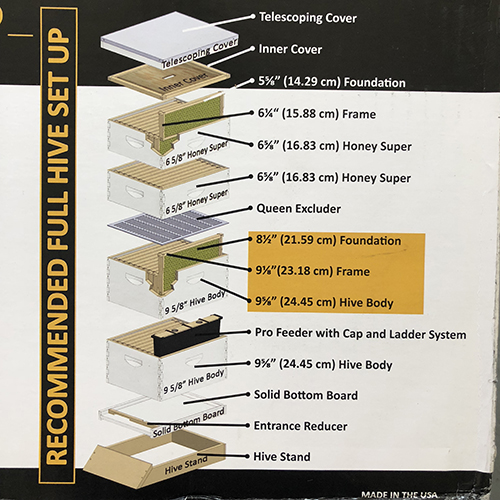
From the bottom up, this is how our hives are set up.
The bottom section is called the bottom board. The bottom board is the floor of the hive. Our bottom board is a screened one. Some evidence has shown that screened bottom boards increase brood production.


Hive boxes are called supers and they sit atop the bottom board. Standard super sizes are deep, medium and shallow. We have a deep super and a medium super with each hive.
In between these supers is a queen separator. This is a grate of sorts, that allows worker bees to pass between supers, but the queen is not able to fit through. The bottom super will house the queen and brood. Brood describes all immature phases of the bee: egg, larvae, prepupae and pupae.


Each super contains hanging wooden frames. These frames are much like hanging files. These wooden frames house foundations, which are sheets of hexagonal cells. These are the foundations upon which the bees build their natural combs.


Atop the supers are the inner and outer covers. The inner cover maintains bee space and provides insulating dead-air space. The outer cover fits over the inner cover as a way to provide weather protection.


Finally, the hives need a feeder. We are using a Boardman feeder. This kind of feeder is made up of a wooden or plastic base that sits in the entrance of the hive. It holds a jar of syrup, upside down. The bees go into a chamber in the base and get to the syrup through the lid of the jar that has tiny holes in it.


Selecting the Hive Site
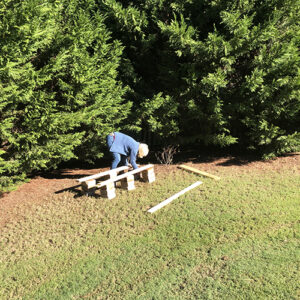
A few weeks after we got our setup, Betsy came out and helped us select a home for our bees. We walked around our yard and looked for a good spot. We wanted to first be mindful of our neighbors, of course.
Luckily our property is lined with large evergreen trees, creating a natural divider which will also help with heavy winds. We can see our neighbors and they can see us, and everyone is respectful.
I’d read that the entrance of the hive should face southeast. Betsy and I agreed on a spot in the back corner of our yard. It’s a great spot! Nestled in the corner and on a slight slope which will help when it rains. Brian can see it from our bedroom or our patio as well.
The bottom board should be off the ground to keep it from getting saturated when it rains. We raised our hives about six inches to a foot off the ground. It varies because of the slope.
Once we selected the site Betsy helped me gather several paver stones at the site. She showed me how the pavers should be arranged, in six columns. On those columns two boards will rest, then the hives will sit on those. I took several pictures and measurements of the setup. I knew I’d have to go back and work on leveling the ground for the columns.
After Betsy and I got the setup in place we wandered into my garage and looked over the accessories and the suit together, talking about this and that. I asked her if she’d ever been stung. She said, “Oh yea. You will be too!” I’d read that again and again but you don’t want to think about it. Just part of beekeeping!
I thanked Betsy over and over, hugging her and telling her just how much it had meant to Brian. It was then that she told me that her father had had ALS. I’d worked with Betsy for 15 years and never knew that. She said she’d given us that gift of love to honor her father. I cried a little then, and I cry now as I type this. That is love, you guys!
Weatherproofing the Hives
Initially we thought we’d keep the boxes natural wood. That involves stain and sealant. After some research and reading we ended up going with white latex paint for our first hives. It’s classic and honestly was easier for me at the time.
Our grocery delivering (and so much more) friend Shannon was stopping by with breakfast one morning after dropping her kids off at school. I called Home Depot and asked someone from the paint counter to pull the paint so she could quick snag it on her way. She did that and brought us the paint. Thank you, Shannon!
It took a weekend to put a couple of good coats of paint on the outside of the supers, as well as the base and on the boards that the hives would sit on outside. Some people don’t paint or stain their hives. It all just depends. The better you weatherproof the outside, the longer it will last.
I set the super boxes on a board that I rested on a windowill and a box about the same height. This made it easy to turn the frames in order to paint each side. In order to paint the bottom boards and outer cover, I just set them on top of the box.


Beehive Accessories
In addition to the hives, there are a few essential accessories that Betsy took care of for us as well. A smoker is something no beekeeper is without! The calming effect of smoke on bees has been noted since ancient times. Smoker fuels include pine straw, paper towels, wood shavings and other things.
Another accessory needed is a hive tool. It is used to pry apart hive parts which bees will glue together with propolis. Hive tools are designed a certain way as such not to damage the wooden frames.
And the bee suit, of course! Betsy was kind enough to get one of those too. Too much! I was so excited about the suit! As soon as it arrived I tried it right on. It fit perfectly. We were ready to go!


The Final Setup
We received our setup last Fall. Brian’s parents visited us just before Christmas. When they were here, I used that time to work in the yard at the hive site. I worked to level the ground out and ensure the pavers were level the way they needed to be.
The hives need to be level across and they need to tilt slightly forward. Hives are titled forward so that water will run out and not collect inside the hive. Achieving this with our setup was not an easy feat. We were working with six columns, two boards, and angles two ways. And I am super picky so it probably took me longer than others might take.
I worked for a few hours and it seemed solid. We were good to go!
Ha, just kidding. After a winter of lots and lots of rain, the columns had shifted and it was clear that my job hadn’t been good enough. A friend was here visiting and we attempted to put the columns right again. We set the hives on it and it felt solid. We were good to go!


Just kidding! I checked it the next day and wondered how the hell I’d not noticed how a couple of the columns were clearly leaning over a bit. I laughed at us and pretty much kind of said, “Bless our hearts,” in my head.
The following week I utilized the time that Brian’s nurse was there to really ensure the ground for the hives was right. I dug the ground down a bit on one side so the pavers would sit level to start. I checked the pavers with the level over and over, on top and on the sides.
It took at least another four hours until I was satisfied. I went back and forth on how many pavers tall to make the columns. The hives should be off the ground but you also want them to be convenient for you, alleviating as much bending over as possible. The hives will be heavy when full of honey. I ended up taking a row of pavers off, as the higher they went, the more likely they were to lean.


I placed the hives and they’ve been there for several days now, through some heavy rains as well. So far, so good. I think we really are ready. The bees will be here soon!