Why a Bird Feeder?
Bird watching is so incredibly relaxing, and also intriguing. It’s fun to learn what types of birds are in your area, and also see how many different types you can attract.
Putting out birdseed is a surefire way to attract birds to your yard, yet so often a pesky squirrel can take the fun out of it by eating all the seed.
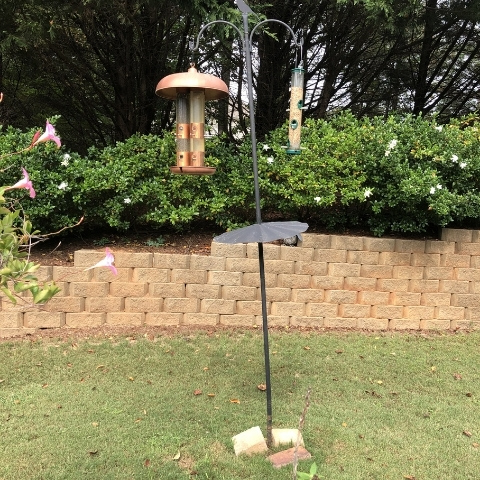
We’ve had a couple of feeders up for a few years but over time, our pole has become bent and it’s been tough keeping the squirrels away. Until now!
In this post, we’ll give you a STEP BY STEP GUIDE to set up your own post for bird feeders!
WHAT’S THE BEST PLACE FOR YOUR BIRD FEEDER?
Look for a spot that’s easily viewed from a place you spend a lot of time. From your favorite spot in the kitchen or the living room, look out the window. Is there a spot that’s a focal point for you? Perhaps you’d like more than one of these.
WHAT TYPE OF BIRD FEEDER?
A lot of what determines the best bird feeder for you is simply how it looks. What’s your favorite design or style? Go with it! The type of seed that’s put out will also determine what type of birds are attracted. Stay tuned as we’re working on a list of our favorite bird feeders and seed.
This project is simple and straightforward, with a short list of supplies, as well as tools. Here, we’ll also tell you about a mistake we made so you can avoid making that same mistake yourself. Hint: if it sounds too good to be true, it probably is!
SUPPLY LIST
Ensure you’ve got your supplies ready and/or available before beginning. Don’t projects typically require at least one trip to the hardware store? Eye roll!
Here’s the list for our project.
4×4″ wooden post (pressure-treated is best)
Two 50 lb. concrete mix*
Two 2×4″ boards to level the post
Water
Hangers
Screws
Squirrel baffle
TOOLS NEEDED
Shovel
Post hole digger
Drill
Tape measure
Screw driver
Level
Ladder
Work gloves
STEP BY STEP GUIDE
- Select a location
- Dig a hole
- Place the post
- Dig hole
- Set the post with concrete
- Place hangers on the post
- Hang the bird feeders and squirrel baffle
- Enjoy!
This is a project that can be done over the weekend. If all your supplies and tools are ready, you can get this up in an afternoon. It started to get dark on us but we were determined to complete the project in one day. Have fun with it and get excited about all the cool birds you’ll be seeing!
Select a Location
Walk around your yard and decide where you’d like to place your feeders. A squirrel baffle will help but they are sneaky little things, so be mindful! If the bird feeder is too close to a tree, a squirrel can jump from the limbs to the top or side of the feeder. They’ll do just about anything for that food!
Once the location is decided, it’s time to start digging. In our case, the location had already been decided as we were replacing an existing feeder. As you can see from this eyesore, it was past time for something different!

Dig a Hole
Time to get to it!
Digging a hole is never a fun task! Luckily, for this project, you’ll only need to dig a hole about 18″ deep and 12″ wide.
Take the time to be sure the hole is a good, even hole, that’s really 18 inches deep. It can be tempting to stop digging before the hole is deep enough.

Place the Post
This step is much easier with two people but can be done with one.
For this step, the post should be placed in the hole and held level while a couple of 2×4″ boards are nailed in to hold it level while the concrete sets.
Get the post as level as possible, then nail a board to the post, and dig that board into the ground so that it helps support the post.
Do that again with another board, using the two boards to ensure the post stays standing straight up.
While setting the post, check it with the level regularly to make sure it stays good and straight!

Set the Post with Concrete*
The reason this has an asterisk is that we tried this project using Sika Pro post liquid instead of concrete. Okay, I say we but my husband says it was all me, that he would have used concrete from the start.
And while he’s right, I feel as though the post liquid might have worked if I’d dug the hole deeper, as the instructions stated. Instead, I went with the standard 18″ for a 4×4 post, after hubby and I discussed. (Which is right for concrete.)
The nice thing about using Quickrete for a single post like this is that it’s easy and no mess, no fuss! For this project, pour the dry mix of the two 50 pound bags of Quickrete around the post.
Once the dry Quickrete has been poured around the post, add up to 2 gallons of water until the Quickrete has become saturated. So easy!
The concrete sets in about 40 minutes. After a couple of hours, we pushed the dirt that had been dug up back around the post and on top of the concrete.
Again, our photos will look a bit different, since we tried the Sika Pro first, but trust us, skip this and go for the concrete!


Place the Hangers on the Post
Use a ladder to hold your hanger against the post and mark the holes for the screws. Where you place the hangers is up to you. Make a note of where the hanger holes are if you plan to match it on other side(s).
Once the holes are marked, use a drill to make pilot holes in the wood. It’s an extra step but this will make it much easier when you go to screw the wood screws in!
After the pilot holes are drilled, place the hangers with the wood screws, finishing them off with a screwdriver to be sure they are all the way in.


Hang the Bird Feeders and Squirrel Baffle
This is the fun part!
Put the bird feeders on the hangers and enjoy the birds in your yard! Place one, two, three or four feeders!
Hang different types of feeders or even plants or pretty outdoor decor. Consider a post cap or even painting the post. The sky’s the limit. Your post, your design!
Different feeders are meant for different birds, and the same goes for the seed. Stay tuned as we’re working on a post about the differences.
It’s so nice to sit in the back yard and watch the birds in the morning or as the sun is setting. Birds have different personalities, which are neat to learn.
Have fun!

Some of Our Bird Photos
This is where it starts to really get fun!
Use a motion sensor app on your phone to capture the birds as they eat and hang out on the feeders.
We’ll update very soon with a few photos we captured.
Enjoy and good luck with your own bird feeder post project!


